

How to Choose the Best Cybersecurity Certification That Offers Top Career Opportunities for You
One of the rapidly growing sectors in India and the global arena is cybersecurity. Selecting an appropriate cyber security program and certification is important to both career growth, eligibility of jobs, and skills development. This guide is going to assist you to make the correct choice.
Know Your Career Stage and Goals
Begin with the analysis of your present level of career development and your aspirations.
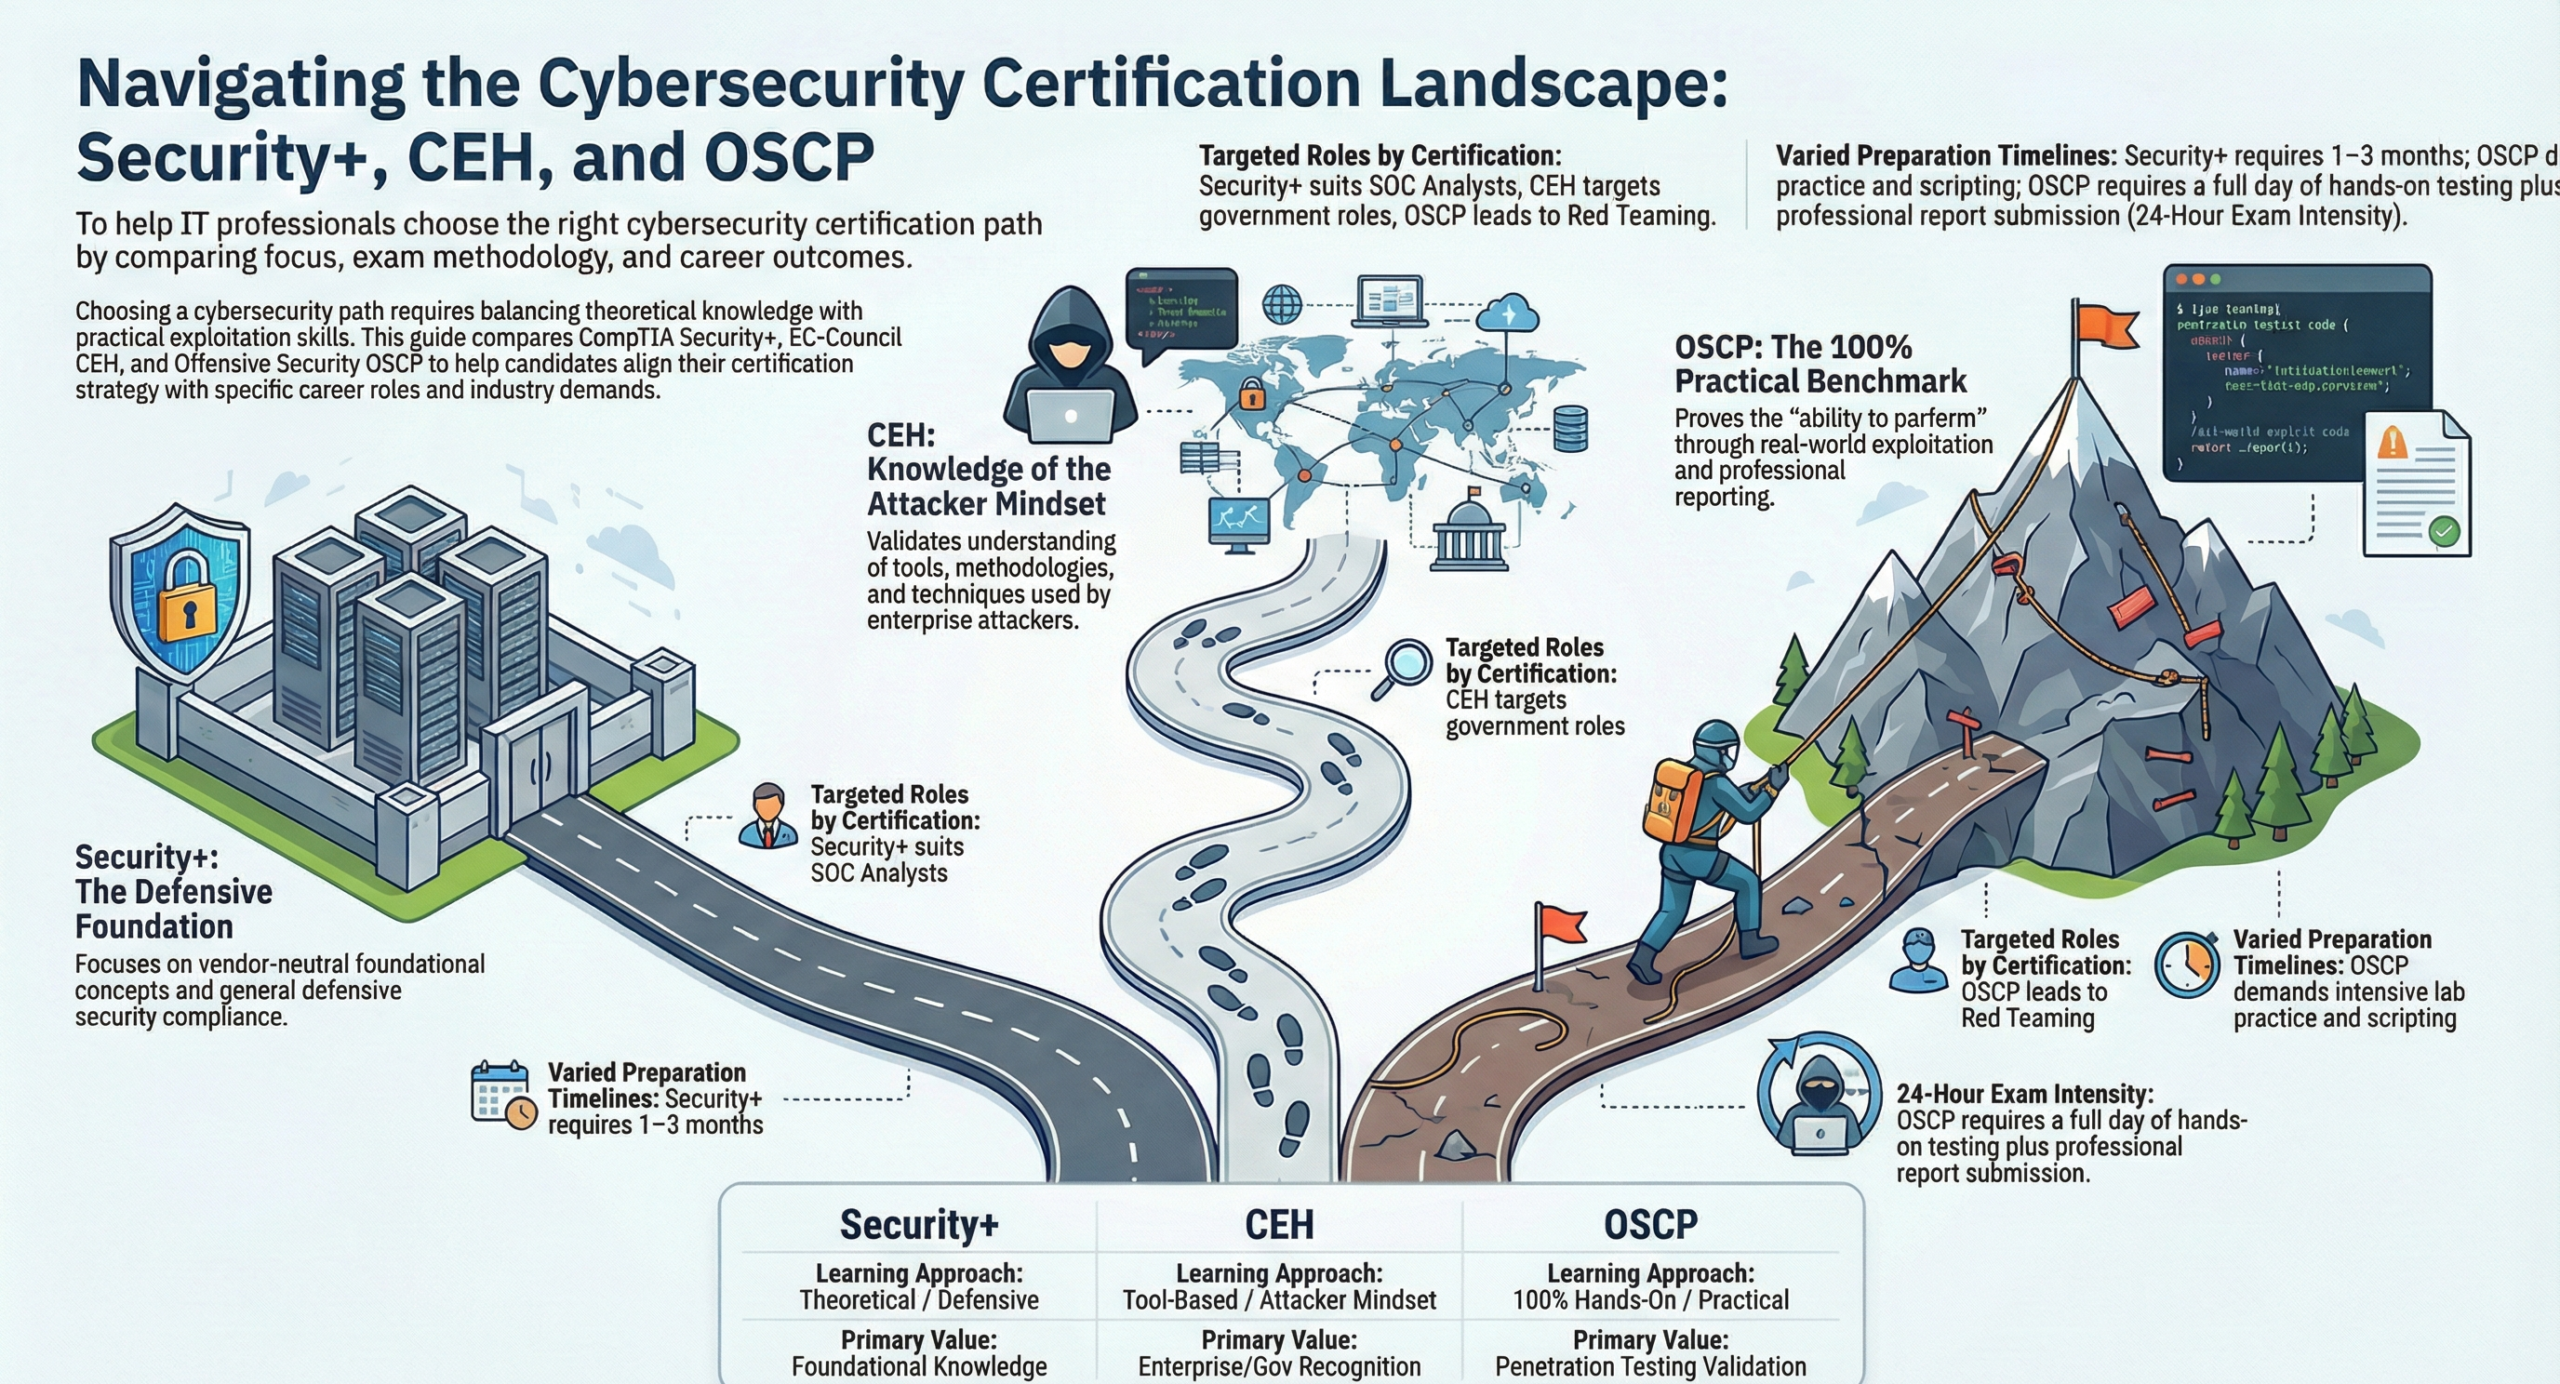
Beginners: It is possible to start with such basic certifications as CompTIA Security+ or SSCP. Study fundamentals of network management, risk management and handling an incident.
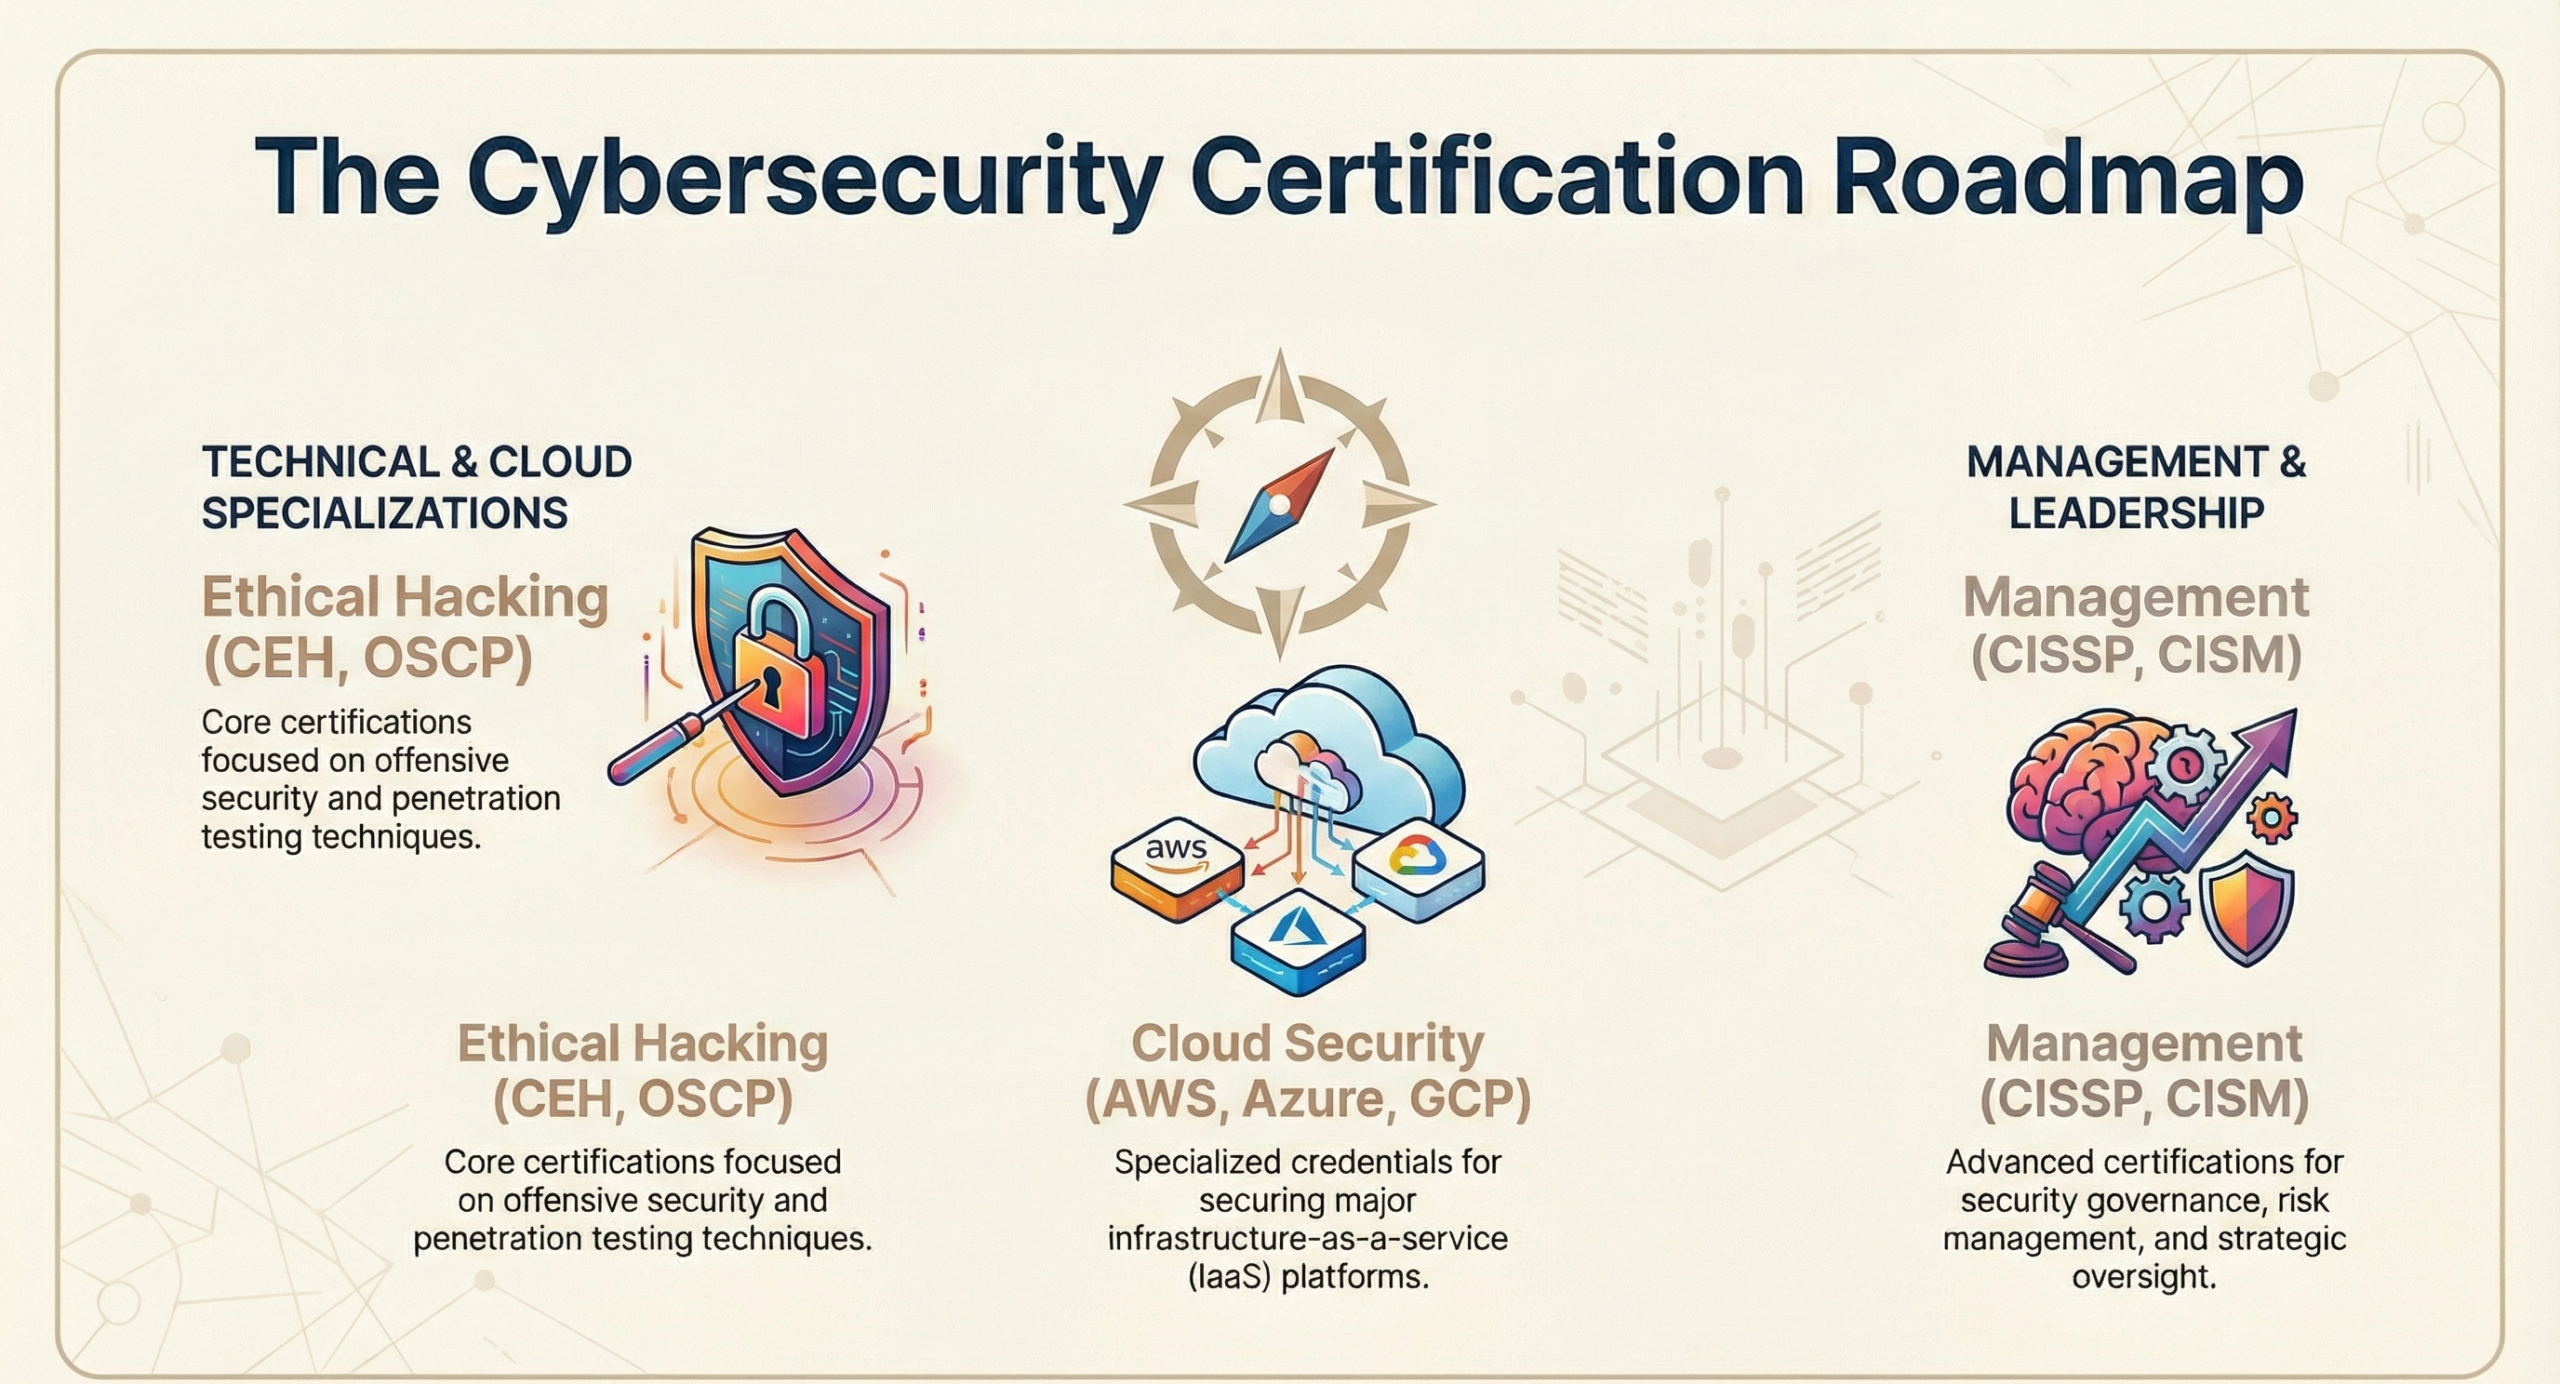
Mid-Level Professionals: Select role based certifications such as CEH, CISA, or CISM based on your interests- penetration testing, auditing or governance.
Advanced / Leadership Roles: The highest level of certifications such as the CISSP or the CCISO demonstrate that you are capable of designing and administering enterprise security programs.
1. What Is a Cyber Security Program and Its Types?
A cyber security program is an academic or planned learning journey where cyber threats to systems, networks and data are instructed. Programs may include:
- Network security
- Ethical hacking
- Cloud security
- Cybersecurity policies and compliance
- Digital forensics
Such programs are either online or in a classroom, can be both short-term and long-term and can result in a certification or a degree.
2. How Long Does a Cyber Security Program Take?
The duration depends on the program type:
| Program Type | Duration |
| Short-term Certification | 3–6 months |
| Diploma Program | 6 –12 months |
| Bachelor’s Degree | 3 –4 years |
| Master’s Degree | 1–2 years |
| Online Certification Courses | 2–6 months
|
3. Cyber Security Certification Fees in India
| Certification | Approx. Cost (INR) |
| CEH (Certified Ethical Hacker) | 50,000–1,00,000 |
| CompTIA Security+ | 25,000–40,000 |
| CISSP | 80,000–1,20,000 |
| AWS Security Specialty | 30,000–50,000 |
| Online Cyber Security Programs | 10,000–50,000 |
4. Top Globally Recognized Cyber Security Certifications
Some of the most respected certifications worldwide:
- Certified Ethical Hacker (CEH) – EC-Council
- CISSP – ISC2
- CISM – ISACA
- CompTIA Security+ / CySA+ / PenTest+ – CompTIA
- OSCP – Offensive Security
These certifications enhance employment and access to lucrative jobs such as Security Analyst, Ethical Hacker, SOC Analyst or Cloud Security Engineer.
5. Choosing the Right Cyber Security Certification for Your Career
Assess Your Career Goals:
- Ethical Hacking → CEH, OSCP
- Cloud Security → Cloud AWS, Azure, GCP Security.
- Management → CISSP, CISM
Eligibility:
- There are certifications that necessitate work experience (CISSP: 5 years)
- Entrap level certifications are easy to understand (Security+, CEH v12).
Budget & Duration:
- Take into consideration the course fees and the exam fees.
- Courses through the internet are time and money saving
Learning Mode:
- Classroom-based, online live, or self-paced online
- Look for practical labs and projects
Job Assistance / Placement:
- Some online programs offer internships or placement support
6. Best Entry-Level Cyber Security Certifications for Freshers in India
| Certification | Highlights |
| CEH | Ethical hacking fundamentals, labs, globally recognized |
| CompTIA Security+ | Networking security, threat analysis |
| Certified Cybersecurity Technician (CCT) | Beginner-friendly, practical skills |
| Google Cybersecurity Professional Certificate | Online, project-based, beginner-friendly |
| ISC2 CC | Entry-level certification for IT security beginners |
FAQs
Q1. Can beginners take CEH certification?
Ans. 1 .Yes, CEH v12 is easy to use, but basic knowledge of IT is helpful.
Q2. Are cyber security certifications recognized globally?
Ans. 2. No, such certifications as CEH, CISSP, CISM, and Security+ are worldwide accepted.
Q3. How much does a cyber security certification cost in India?
Ans. 3 Between ₹10,000 to ₹1,20,000 depending on the certification and platform.
Q4. Can I complete a cyber security program online?
Ans. 4 Yes, there are numerous programs that are entirely online including labs, projects, and certificates.
Q5. Which is the best certification for career growth in India?
Ans. 5 CEH for ethical hacking, Security+ for beginners, CISSP/CISM for management roles, AWS Security for cloud roles.
Conclusion
The selection of an appropriate cyber security program and certification varies based on your career objectives, level of experience and budgets available and the mode of learning. CEH, Security+, and Google Cybersecurity Certificate are a good starting point among beginners. More skilled users will have an opportunity to pursue CISSP, CISM, or OSCP as well as cloud security certifications.